256 Colour Tutorial Part 1
Basic setups
(by Gilbert Cheung)
Knowing 256 colour modes
First, here are some basic knowledge about 256-colour modes. You may skip the following paragraph if you think you know enough about them already.
Under 256 (8-bit) colour modes, each pixel on screen is stored as one byte (8-bit). Unlike the "Direct Colour" modes (15/16-bit hi-colour and 24/32-bit true-colour modes; 8-bit colour modes are "Indexed Colour" modes) the contents of the 256 colour slots in 8-bit modes need not be fixed, but instead, each of the slots can be set to any of the available 262,144 colours (the VGA/MCGA base palette) at one time, so you can make variations to the colours displayed to suit your needs.
Preparations
If you have made up your mind and have decided clearly that you want to use 8-bit graphics for your game, not only for the sake of simplicity, file sizes and speed, but mainly want it to be benefited from the fancy palette effects, you really should do some work in the planning stage, about the usage of the colour slots, before starting the production. The underlying reason is, unlike the "Direct Colour" modes (in which you can draw each piece of your graphics with any combinations of the available colours, without affecting one-another), you must take care of the dependencies in 8-bit modes. For example, if you set colour slot #50 to yellow in one sprite, you can't make another sprite which may appear at the same time, to have slot #50 set to red. Moreover, if you use MANY variations of colours on your sprites, you may need to worry about the 256 limited slots all being used up quickly.
When you start a new game in the AGS editor, by default (as of AGS V3.1), it will be a hi-colour one, so to use 8-bit graphics, the first thing you need to do is to change the Colour depth to '8-bit colour' in General Settings. Now, double click Colours in the editor's item tree, you'll see the default set of palette colours as follows:

There are a total of 256 usable colour slots (slot #0 through slot #255), of which slots #0 through #41 are assigned as "Gamewide" by default, whereas the remaining 214 colours (slot #42 through #255) are assigned as "Background". Normally, the "Gamewide" colours are for graphics that would be used throughout the game (usually sprites), whereas the "Background" colours are for graphics whose uses are only limited to a certain room only (usually room backgrounds), so their values can be different in different rooms, as shown by the "x" on each of these slots.
Now, click on one of the colour slots, if it's not a "Background" colour, you'll see some (R, G, B) values in the Colour entry on the lower-right corner of the editor. This order-tuple of values determines how the colour of that particular slot will be like in the game. You can change these (R)ed, (G)reen and (B)lue channel values for that slot by using the keyboard and each channel can take values from the range 0 (zero intensity) to 255 (full intensity). For instance, (0, 0, 0) is black, (255, 0, 0) is red, whereas (255, 255, 255) is white. Now, try different combinations of channel values. I hope you'll get a hang on how things work now.
Note: Depending on the graphics packages you are using, the channel ranges may be expressed differently. For example, in Deluxe Paint ][ Enhanced, each of the channels' intensity ranges from 0 to 100, and in some of the more "modern" programmes like Grafx 2 the range is probably from 0 to 255. In fact, there are a total of 64 intensity levels for each colour channel in 8-bit modes and this is what the AGS engine currently adopts. Unfortunately, in the current version of AGS, palette handling is quite ambiguous as you have to use values from 0 to 63 in scripts, but the editor shows that each channel takes values from 0 to 255 (to match the colour picker provided by Windows), which is quite confusing. Nonetheless, when imported into the AGS editor, they will be hashed to the standard 64 level intensity internally anyway.
After having fun messing with the colours, it's a nice idea to quit the editor to discard the nasty random colour tests you have made and restart it, and it's now time for the important part - to make the decision on the general usage of the slots - how many slots should be "Gamewide" so they'll be "unchanged" (words like "unchanged" are relative terms in my tutorials and you will find out why later...) through-out the whole game, and how many of them should be set as "Background" so they can be different in different rooms. I suggest that you divide the palette into 2 parts - the first part and the second part, in which the first part is for the "Gamewide" colours, the second part is for the "Background" colours, and don't let them scattered around for the sake of better organisation. Now there're 256 colour slots in total, you may decide how many colours should be assigned as "Gamewide" (mainly for sprites) and use the rest as "Background" (mainly for room backgrounds as the name suggests). If for example, you want your sprites to look more cartoony and don't need much variations on their colours you may assign less colour slots to them (thus you can have more colours for backgrounds); on the other hand, if you need more colours for sprites you may assign more slots to them (the drawback is that you may have less free colours for room backgrounds). If you cannot make up your mind I suggest you divide the palette into two equal halves, that is, to use the first half (#0 to #127) for sprites and the second half (#128 to #255) for backgrounds, and if you do things right you can still change the assignment halfway through the production process if needed.
Now, DO NOT CHANGE ANYTHING IN THE PALETTE, this is not (yet) required in this stage. Right click the palette colours and choose "Export to file...", name the file and save it as a .BMP file, like this. DON'T bother using the .PAL format, as most graphics packages nowadays can load .BMP files already and .PAL is an ambiguous file extension that different graphics packages may interpret the format differently. Even if your favourite graphics package cannot load .BMP files, you can change the files to a supported format using free conversion tools (e.g. Irfan View) which won't change the colours or mess with the palette slot orders during conversions, which is VERY important if you take it serious and really want to use the 8-bit palette effects to the max. You can keep a copy of the saved file in a safe place for your convenience, in case you'll start another 256-colour project later (or just download the file linked above).
Making your first sprites in 256 colours
You can now make some graphics with your favourite graphics package, but bear in mind that if you really want to do nifty effects with the 8-bit palette, it's always preferable to create the graphics natively under this colour depth, to save you from the mess of conversions. Two good choices of such programmes are Deluxe Paint ][ Enhanced (DP2E) and Grafx 2, as they're 8-bit pixel graphics editors and they won't do foolish things automatically (like "friendly" sorting and trimming your palette, merging slots with similar colours, dithering you images, etc.). This is VERY important, as we want the imported graphics to be COMPLETELY IDENTICAL to the original, including the order of the colours assigned to the slot indices, for the desired effects to work. Most of the other graphics programmes, especially those Windows "modern" "powerful" ones, like M$Pain (hehe), Photoshop or Paintshop Pro, etc., are definitely NOT good choices. So take my advice - DON'T USE THEM, or else you will end up in miserable troubles like some time traveller did.
I usually start by drawing some sprites first, because after you have set up some of the "Gamewide" colours for the sprites, you can also use them in backgrounds if appropriate. After starting the graphics package of your choice, the first thing you need to do is to make the editing palette of your image to match the one you have exported from the AGS editor. In some of the graphics packages you can just start a new image and import the palette from the exported .BMP file but for programmes without this feature (like DP2E or Grafx 2) you can use the following trick:
- Simply load the exported .BMP file into the programme. In case of programmes (like DP2E) not supporting this graphics format, convert the image to some other format they can load (say, PCX) first.
- Well, the size of the exported image was just '10 pixels by 10 pixels', which is obviously not what you want. You can just change the image size yourself (e.g. '320 pixels by 240 pixels', depending on your own needs. If you're drawing sprites just set it to a size which you think is large enough to hold some amount of sprites you're making in one session; if you're drawing a background just set it to the game's screen size for a non-scrollable room, or some other larger appropriate size if it's for a scrollable room). Note: To change the image size, if you're using DP2E, just choose "PICT(URE) --> Page Size..." and then enter the new size in the boxes below Custom size, then click "OK"; if you're using Grafx 2, just click the "Screen size / Safe. res." icon, click the Width and Height boxes to change them (you have to hit ENTER after entering a value), then click "OK".
- Clear the image (with a background colour of your choice, usually slot 0) to make sure that the canvas is clean for you to paint on it.
- Save the image with a name of your choice. It will become a base image for your graphics.
Before you start drawing, you may do two more things to aid you through the rest of your creations:
- If you don't like the default colours set by AGS you may discard them first (if you don't have problems with their existence, and like to use them in their default forms anyway or, if you want to keep CJ's original classic Roger and GUI sprites, just skip this step). Note that the first 17 colours (slots #0 through #16) are supposed to be used by the engine to display system messages, etc., so it is not advisable to change them (these colours were marked as "locked" in previous versions of AGS). This leaves slots #17 through #41, that you can change if required. The easiest way to do this is to turn them all into black first. Tip: If you are using DP2E, launch the palette dialogue by clicking on the active colour on the bottom right part of the screen, first click colour #16 (the first colour on the second column, which is already black), click the "Spread" button, then click colour #47 (the last colour on the third row, which is also black by default). If you are using Grafx 2, launch the palette dialogue by clicking the "palette editor" button, click colour #16, hold the mouse button and drag until the colours in the second and the third columns are all selected, then click the "Spread" button. Note: Be careful that you don't alter the colours of the "locked" colours.
- You may have noticed that colour #0 is black by default, but now I am telling you, that you should change the colour of this entry to something else (even if it belongs to a "locked" colour, I will explain later). I usually change it to pink (by dragging both of the R and B sliders to full intensity) which is the default transparent colour used in many programmes, if you want to use this pink colour (or some other colours close enough to it) in you game's graphics, you may change the colour of this slot to some other colour that will clash less with your in-game graphics. After the changes the palette should look like this:

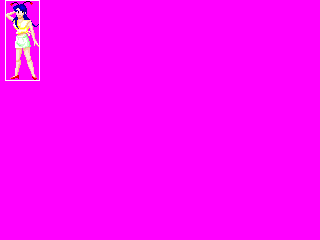
You can now start setting some of the colours, starting from the first editable one (i.e. slot #17, or #42 if you want to keep the original colours set by the AGS editor), to colours that you think will be commonly used by your sprites, then you may start drawing your sprites, adding more colours to the palette in the process, if needed. For example, I come up with this which contains the following sprite:
The palette is currently set up like this:

You'll see that before drawing this first sprite, I thought that shades of skin colour, red and blue might be quite frequently used in my sprites, so I first set up slots #17 to #31 to contain these colours (the second row). Even though some of the slots were still not used for painting my first sprite, they may still be used later in some other sprites in the future, so don't be afraid that they'd be wasted at the time being. When I was drawing the sprite I added more colours to the palette when needed (see the third row of colours). Note that when I needed the black colour I used slot #16 (like in her antennae and eyes), whereas when I needed the transparent colour I used slot #0, as shown by the surrounding pink colour. That's the reason I changed slot #0 to some other colour - it won't clash with the black colour in case I need to use it in my sprites. Note also that I drew a white rectangle surrounding the sprite. It will certainly help when it is to be imported into an AGS game.
Next, I may continue to draw more sprites, but as I am so excited I really want to see it imported into my game. Go to the Colours section of the AGS editor, change the range of colours to import as "Gamewide". In my case it's slot #17 through #37, so I first click slot #17, HOLD the SHIFT key and click slot #37, so that the desired range is selected, and then select "Replace selected slots from file..." after right-clicking on the selected colours. We just need to choose the image file containing the sprite (if it already is in .BMP format; if not, convert it to .BMP format first), and the colours of the selected slots will change to match your image file. Now, slots #38 through #41 still contain the original colours set by the editor and I don't like them, so I just select these 4 slots (click slot #38, hold SHIFT and click slot #41) and change them to Background, to make them get out of my sight temporally. The current palette should look like this:

Go to the Sprites section of the AGS editor, right click and select "Import new sprite from file..." and select that image file containing the sprite, making sure that 1) the "Remap colours to game palette" checkbox is unchecked, and 2) the Transparent colour is set to "Palette index 0" (you can set the other settings yourself depending on your need), as below:

Now, right drag the rectangle to match the size, blah bla... and your imported sprite will now be stored EXACTLY like the originally drawn one. (During import you may see that the pink colour becomes black, but don't panic, as you'll later find out that it should be imported perfectly with that "pink" colour region transparent when you put it over a background. You may also find out that drawing a rectangle around the sprite helps, otherwise I might have cropped out the antennae accidentally.)
Note: As of AGS V3.1.2, the editor cannot remember some of these settings (in particular the "Remap colours to game palette" option) well, so if you import another sprite later, you should double-check to make sure that the settings are correct before importing. This is unfortunately a step backward as this issue was supposed to be fixed since V2.61 in the old editor. Also, the sprites may not be shown in their correct colours in the sprite lists (sometimes, you need to restart the editor to have them shown correctly), so you need to check them later in-game to make sure that they're imported correctly.
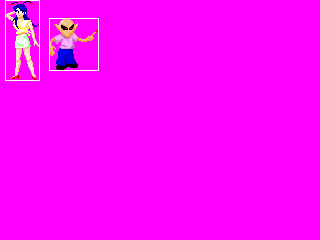
Now I draw another sprite on the same image file, adding the following sprite:
The palette has now become:

You'll see that in this second sprite some of the "Gamewide" colours set before were used (this time I even used some of the colours that are not used in the last sprite, e.g. slot #17, the darkest skin tone), and more colours were added (slots #38 through #40). So, to import this sprite, I first select slot #38 to slot #40 in the Palette editor (like before), change them to "Gamewide" (if necessary), and then import these three new colours from the sprite sheet into the editor:

That's one way you can create sprites in the game-making process, and how to add more colours (if needed) in due course. So, basically you can draw more sprites, adding more colours if needed, import, draw more sprites, and so on. One thing you need to take care of is what you had decided at the beginning - how many colour slots were actually assigned for those "fixed" sprite colours (in my case they're slots #0 to #127), so when you design your sprites and add colours to the palette, make sure you have some planning on them, and don't add too many new colours unless it's really necessary, or it will reach the limit you have set real quickly, and that should not be considered good organisation. (If you are sure that your backgrounds won't need that many colours, you may make a compromise though, that is, change your decision by increasing the number of colour slots planned for sprites, but you will have less free slots for backgrounds then.)
Making your first backgrounds in 256 colours
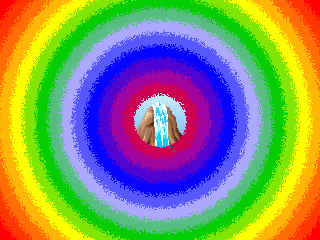
Having done some sprites I think it's now time for me to make some backgrounds. First I make this background. You may check it and see that its palette is like:

Note that when I make a background I just save a sprite image with a different name (so it has all the sprite colours properly set), change its size to the background size I need, clear it, and then start adding colours from the end of the palette, as they're supposed to be "room dependent", so you can paint your backgrounds with these slots and make them different in different backgrounds if necessary. Note also that the first half of the palette matches that of the sprites so I can still use these fixed colours in my backgrounds if necessary (just don't change their colours as you may have drawn some of the sprites with these slots already). Now you may try importing it as a room background. My test game used 320x240 as its default resolution, so the background is of this dimension. Before actually importing any background into a room, go to "File --> Preferences..." and make sure that "Remap palette of room backgrounds into allocated background palette slots (8-bit games only)" box under the 8-bit background import section is unchecked, like this:

This is to ensure that the backgrounds will be imported in an unaltered stage, without the colours of it being rudely moved around by the editor (similar to the sprites). This is very important! Now, add a new room (or, if you're using the default game template, just edit Room 1), make sure that Background to display is set to "Main background", click the Change... button on the right and then select the background image file. The background should be imported without any problem.
It's time for me to try out how it'll look like in a compiled game now:

I had added the two imported sprites as objects to check if things went smoothly, note that the girl's sprite was imported perfectly as her antennae are intact and are not "eaten" by the dark transparent colour during import. This is one importance of having stuff imported exactly as they're originally drawn.
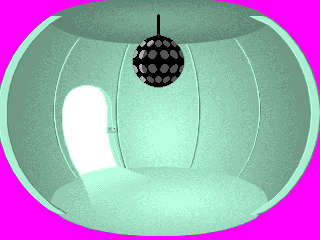
I am happy, so I draw one more background. This time the palette is like:

Obviously the colours assigned for this background are different from the last one, that's how "Background" slots work.
If you examine the image, you may have noted that I used also colour slot #0 in it, which was set to pink by me. I just use it for some reasons and it's not important here, and remember that after import it will always become black.
I can now import the background with exact palette blah bla... (like before) as the background of another room.
Next, I think it may be a good idea to add a door to the disco room, so I havet to draw a sprite for it, but I want it to blend with the background perfectly, and since that sprite will only be used in one room, it doesn't seem like a good idea to waste "fixed" sprite colour slots by duplicating some of the colours from the background. What should I do? I just draw this, which uses the "Background" colour slots directly. You may have asked, "aren't these slots available ONLY for backgrounds?" The answer is, "Yes, and No." These slots can be used for backgrounds, but you can actually use them in sprites too, provided that each of these sprites is only used in one particular room or other rooms using similar colour settings, otherwise it may look funny.
To import this door sprite, go to Sprites and open up the import dialogue, make sure you have unchecked "Remap colours to game palette" and select "Palette index 0" as the transparent colour, AND check the "Lock to room background palette" box. You can then import the sprite like before.
If you place the sprite as an object in the room you'll find out whether it's imported properly (if you try putting it in the "dizzy" room, you may find it looking funny, since the two room backgrounds use different colours; note also that currently it seems that the sprite's colour may be messed up when you first place it onto the room in the editor, but if you test the game or restart the editor, the problem seems to have gone):

Note that I also place Roger in the room for comparison, and he looks real funny, like a zombie. That's because I changed the colours of slots #17 through #41 when I first set up the palette, so if you want to keep CJ's original Roger and GUI, etc. sprites intact you shouldn't change them.
Conclusion
I think this tutorial is long enough to keep you awake, and it's only about basic stuff. It's about done for this part already, but before I stop I'll give you a present, which is how the materials put together into an AGS "game" would be like:
To test it just unzip it into an empty folder and load up Game.agf via the AGS editor and press F5 to test the game. room1.crm is the "dizzy" room, where you can click to transport you to room2.crm, which is the "disco" room, where you can click on the door(way) to toggle between opening and closing of the door, which shows you how the door sprite matches perfectly with the background. If you're having enough "fun" just press ctrl-Q to quit.)
Coming next - Part 2: Palette effects using pre-defined functions
Downloadable files used in this part
- BMP image - contains the default AGS palette
- BMP image - the Girl sprite
- BMP image - the Girl and the Alien sprites
- BMP image - "Dizzy" background
- BMP image - "Disco" background
- BMP image - Door sprite
- ZIP file - Part 1 stuff
(Return to Using 256 colour graphics in AGS)