Creating Custom Save and Load Dialogs
(Bold textThis page is a work in progress and is not yet completed)
Introduction
Creating custom save and load dialogs is a neccesity when it comes to making dialogs and GUIs that follow some sort of constant style. Chances are that the default save/load dialogs do not match the other GUIs, so creating new ones would help.
Here, I will (hopefully) make custom save/load dialogs a fairly trivial matter. This guide will step you through the creation of the save GUI...translating this to a load GUI will be discussed at the end.
Create the GUI
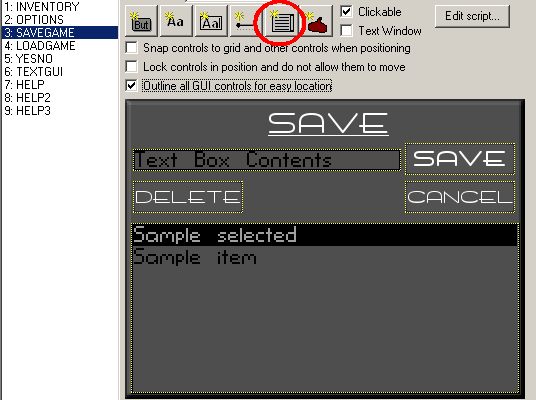
Here is an example of a custom save GUI.
In the above image, the elements used are three buttons, a text box, and a GUI list box. The GUI list box is added using the circled button. Resize and reposition these elements as needed.
ALso, give the GUI a name. In this example, I use "gSaveGame".
Give Elements Script Names
When you click on an element of the GUI, the "Script name" property is the first one in the properties window. Give all elements of the GUI appropriate names.
In this example, I used:
Save Button: btnConfirmSave Cancel Button: btnCancelSave Delete Button: btnDeleteSave Text Box: txtSaveName GUI List: lstSaveGames
Script the Cancel Button
Now comes the scripting, but we'll start with the easy part. Double click the "Cancel" button and enter the following:
//Turn off the save dialog
gSavegame.Visible = false;
TO BE CONTINUED
